Using Look Lut
From an empty window to graded footage in Final Cut Pro: the whole workflow in four parts.
Part 1
Load your footage and your library
Point Look Lut at your LUT folder
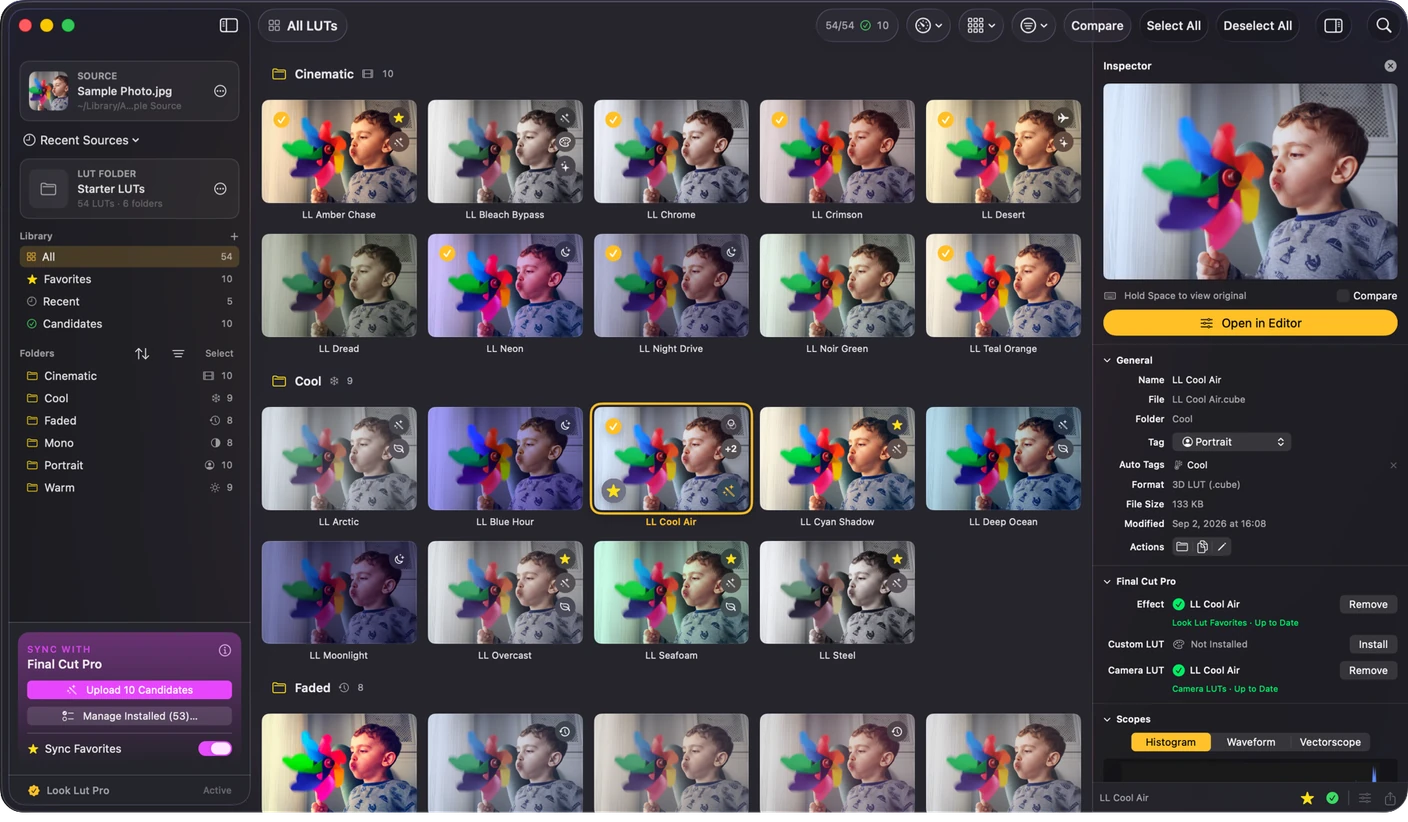
Choose the folder where your .cube files live. Look Lut scans it recursively, so subfolders show up in the sidebar, so a pack like “Film Emulation / Kodak” keeps its structure. There is no import step and no library size limit; the folder stays where it is.
Load a photo or a video
Open the image or clip you’re actually grading. For video, scrub to a representative frame, and every thumbnail in the grid re-renders on that exact frame. Pick a frame with skin tones if the shot has people; that’s where LUTs differ the most.
Let the grid render
Thumbnails render on demand as you scroll, on the GPU, so even a folder with thousands of LUTs opens instantly. Duplicate files are detected automatically (by table content, not file name) and every copy carries a badge naming the files it matches. Flip on Hide Duplicates in the grid header to collapse them.
Part 2
Judge looks like a colorist
Click to inspect, hold Space to compare
Clicking a cell opens the Inspector with a large preview and every action. Hovering never changes anything; the preview only follows your selection, so you can move the mouse freely.
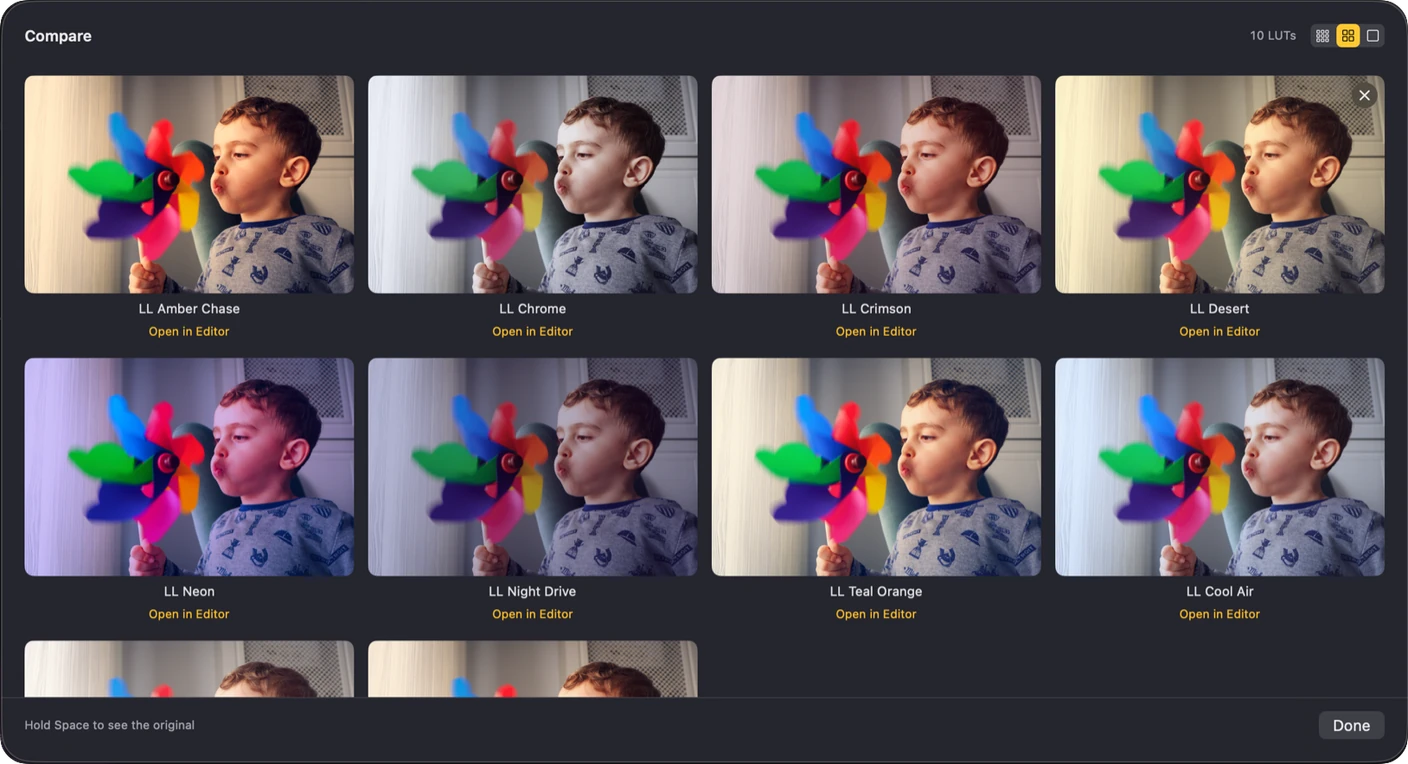
Hold Space to flash the original frame, release to come back. Do it a few times fast, and the flicker shows you exactly what the LUT is doing.
Build a shortlist with candidates
Hover a cell and click the checkmark (top-left) to mark it as a candidate. Candidates persist per library and collect in their own sidebar row. Along the bottom of the thumbnail, the star on the left is a one-click favorite and the wand on the right opens the install sheet for that one LUT.
Compare finalists side by side
Free compares 2 candidates at a time. With Pro, press Compare to put your whole shortlist side by side on the current frame, however many candidates it holds. Space works here too.
Part 3
Fine-tune in the detail editor
Open a LUT full-screen
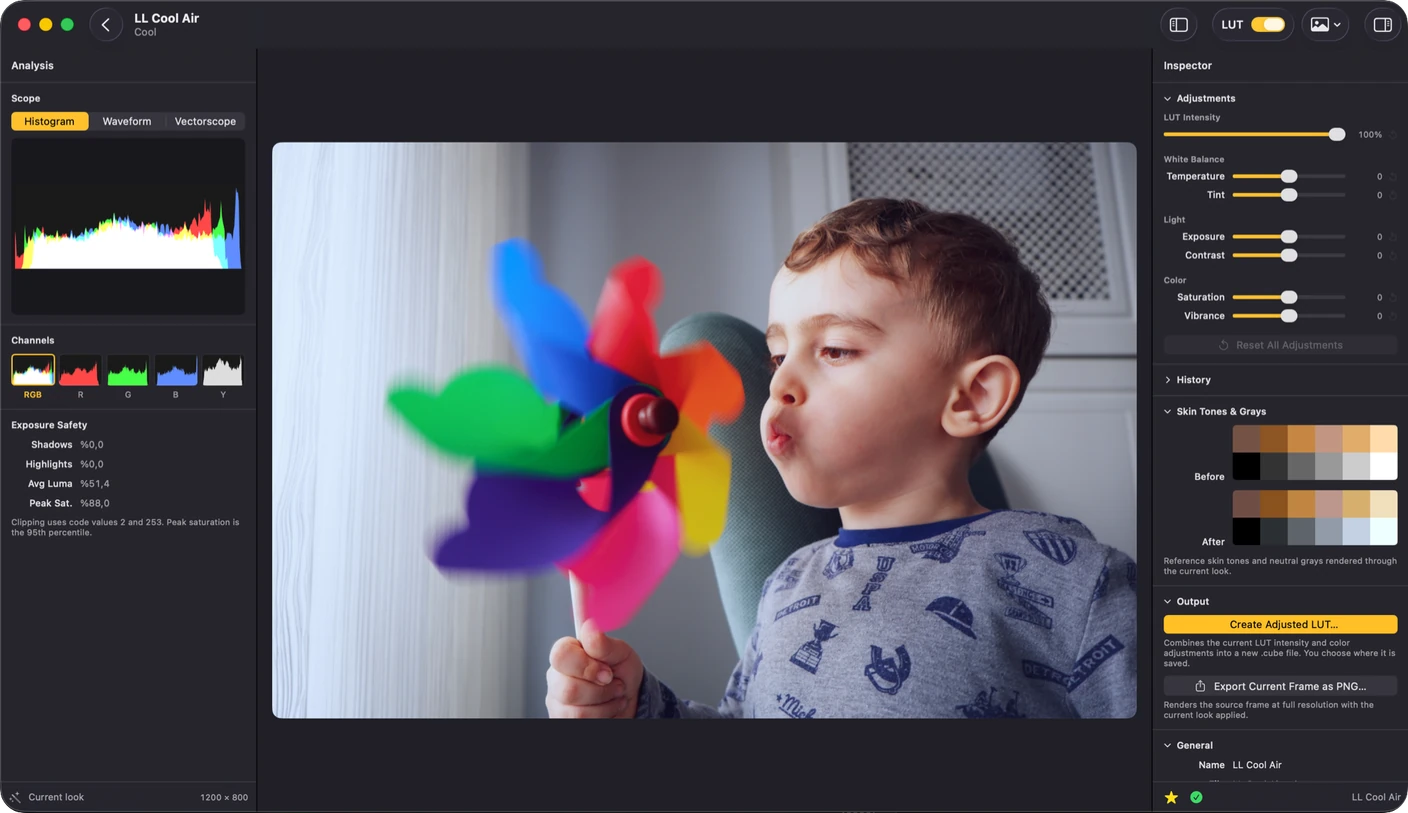
Double-click a cell (or press ⏎) to open the detail editor. Use ←/→ to step through neighboring LUTs without going back to the grid.
Adjust on top of the look
Dial the LUT’s intensity, then white balance, exposure, vibrance, contrast and saturation. Every slider drag is one undo step, so ⌘Z / ⇧⌘Z walk the history.
Check scopes and skin tones
Toggle Analysis in the toolbar for the panel on the left: histogram, waveform and vectorscope (with the skin-tone line), plus clipping and average luma readouts, all tracking every change live. On the other side, the Inspector’s skin-tone patch strip shows standard ColorChecker tones and gray steps before and after the current look, an instant “does this wreck skin?” check.
Export if you want
The editor’s Output section holds both: Export Current Frame as PNG is free and writes the graded frame at full resolution; Create Adjusted LUT is Pro and bakes the LUT with your adjustments into a brand-new .cube file you can use anywhere.
Part 4
Install the winners into Final Cut Pro
Install as effects
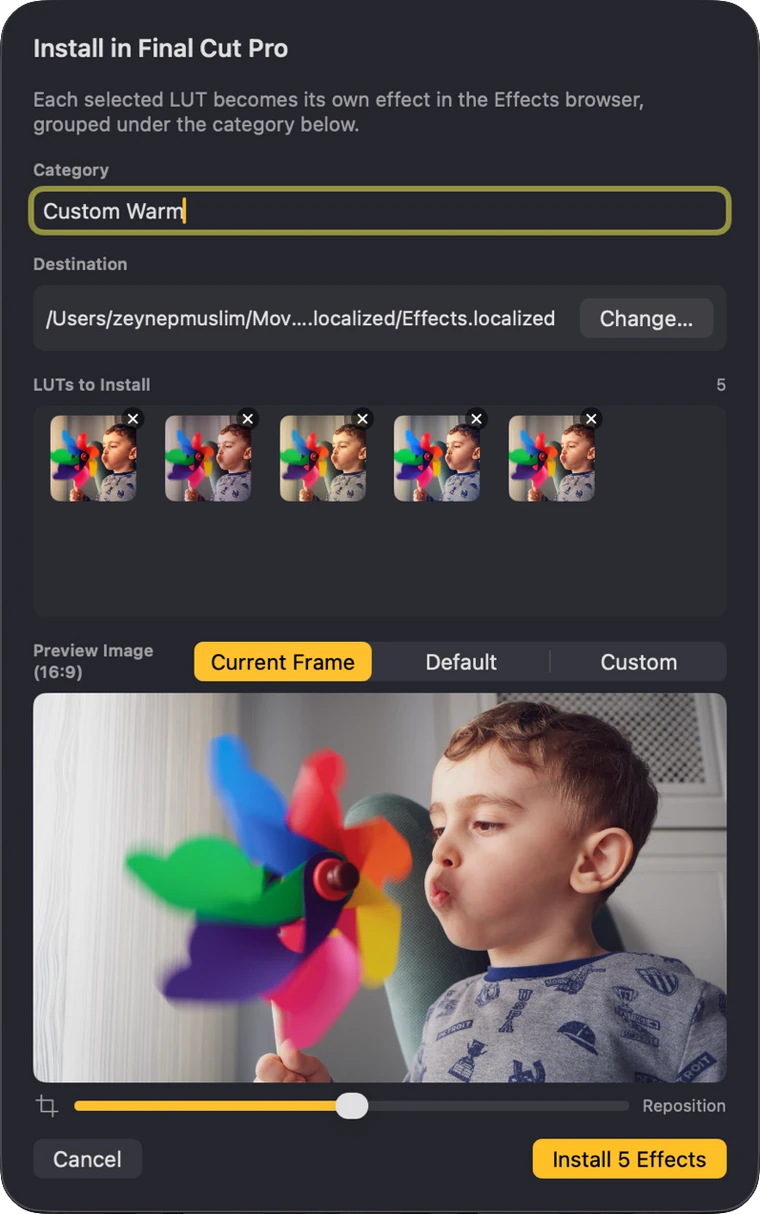
Press the wand on a cell, or the Upload button in the Final Cut Pro card at the bottom of the sidebar to install the whole candidate set: the button names what it is about to send. Pick a category name, confirm, and each LUT becomes a Motion effect template in FCP’s Effects browser, with a preview thumbnail rendered through that LUT. A whole folder can be installed from its right-click menu.
The free build installs 5 per batch: the first 5 go over and the rest stay selected for the next batch, so nothing is cancelled and no selection is lost. Look Lut Pro sends the whole folder at once.
Or install as Camera or Custom LUTs
A .cube can also go straight into Final Cut Pro’s own LUT folders instead of becoming an effect, from a cell’s right-click menu or the Final Cut Pro section of the Inspector. As a Camera LUT it lands in the Info inspector’s Camera LUT pop-up and applies before any grade, which is what log footage needs; as a Custom LUT it feeds the Custom LUT effect, a look inside the stack.
Manage everything later
The manage sheet (sidebar bottom bar) lists everything Look Lut ever installed, grouped by category, with a drift status per effect: up to date, source LUT changed, source missing, or removed outside the app. Update or remove per effect; Look Lut Pro brings every drifted effect back in line with one click. Cells in the grid show a wand or camera badge when their LUT is installed.
Optional: favorites auto-syncPro
Turn on Favorites sync once and your starred LUTs mirror into a “Look Lut Favorites” category in FCP automatically. Star a look to add it; unstar it to remove it. Look Lut keeps the category up to date.
Reference
Keyboard shortcuts
| Space (hold) | Flash the original, ungraded frame. Works in the grid, the detail editor and the compare sheet |
| ← ↑ ↓ → | Move the selection through the grid (the panel follows) |
| ⏎ Return | Open the selected LUT in the detail editor |
| ← / → (in editor) | Step to the previous / next LUT without leaving the editor |
| F | Toggle favorite on the selected LUT |
| D | Add the selected LUT to Candidates, or take it back out |
| ⌘Z / ⇧⌘Z | Undo / redo adjustments in the detail editor |
| Esc | Close the selection panel, or leave the detail editor |
| ⌥⌘I | Show / hide the Inspector |
| ⌘, | Settings: light/dark override and in-app text size |